Organization isn't sexy, which is probably why most builders treat it like a chore to be solved once and forgotten. In reality, your storage system is the difference between knowing exactly where that rare dark tan slope is versus excavating three bins to find it. After 25 years of building and watching collectors in my circle, the ones who produce the best MOCs and actually enjoy their hobby are the ones who got serious about their storage setup early. This isn't about perfection or making your shelves look nice for Instagram. It's about friction, about whether you can grab a specific element in 30 seconds or spend 20 minutes hunting.
Most people organize once, realize their system doesn't work, and abandon it for chaos. The guides that proliferate online treat organization as this one-size-fits-all problem, when the truth is simpler: your system has to match your building habits, not some ideal. If you primarily build MOCs and constantly need quick access, color sorting makes more sense than type sorting. If you're a set builder or rebuilder, the opposite is true. Before you buy a single bin or label maker, understand what you actually need. That's where this guide starts.
You know the moment. You need a single 1x2 dark tan plate. You own it. You know you own it. And you spend 25 minutes elbow-deep in a bin of mixed bricks trying to find it while the instructions stare at you from across the table. The ziplock bags have multiplied. The "I'll sort this later" pile on the spare room table has developed its own zip code. Your collection has outgrown your system, assuming you ever had one.
I have reorganized my collection three times now, each time because the previous system collapsed under the weight of more sets. I went from shoebox chaos to color-sorted bins to a full type-sorted KALLAX wall, and I made every wrong choice along the way. Stepped on a 2x4 brick in the dark. Knocked over an unsorted tub and spent an entire Saturday picking pieces out of carpet. The usual.
This is everything I have learned about keeping a LEGO collection findable and functional. Sorting methods, actual storage products with real prices, labeling, and the daily habits that keep entropy from winning. Whether you have 5,000 pieces or 500,000, the approach is the same. The scale changes. The logic does not.
This argument comes up in every LEGO forum, every Facebook group, every Reddit thread. Color or type? I have a strong opinion here, and I will not pretend to be neutral about it.
Sorting by color means all your red pieces go together - red plates, red bricks, red slopes, red tiles, one bin. It looks gorgeous. Open the drawer and it is this satisfying monochrome sea. Photographs beautifully. Impresses people who come over. And it is nearly useless for actually building anything.
Here is why. When you need a 1x4 red plate, you are digging through every red element you own. Red slopes, red curves, red Technic beams - they all look the same from above, and your fingers cannot tell a plate from a tile when everything is the same color. This gets worse the more pieces you own. Color sorting works fine up to maybe 10,000 pieces. After that, you are spending more time searching than building.
Sort by type instead. All your 1x4 plates go together - red, blue, white, black, whatever. The drawers look like a rainbow exploded. Zero visual satisfaction. But when you need a 1x4 plate, you open one drawer, your eyes find the color instantly (turns out humans are really good at spotting colors), and you grab it in seconds. Type sorting scales. It works at 10,000 pieces and it still works at 500,000.
Sort by type. I am not going to hedge on this. The Instagram-worthy color bins are a trap. If you need something pretty to look at, admire your finished builds.
In practice, most experienced builders land on a hybrid. Common elements - plates, bricks, slopes, tiles - get sorted by type into their own containers. Technic pins, axles, and connectors get a separate Technic section. Minifig accessories and printed elements get category bins. Baseplates and big panels go in their own oversized storage because they do not fit anywhere else.
The logic is simple: you do not need the same level of detail for everything. A bin of mixed Technic connectors is easy to search because the elements look completely different from each other. A bin of mixed plates is not, because a 1x2 and a 1x4 plate in the same color look identical at a glance. Go fine-grained where it matters. Go coarse where it does not. Match the system to how you actually build, not to some organizational ideal you saw on YouTube.
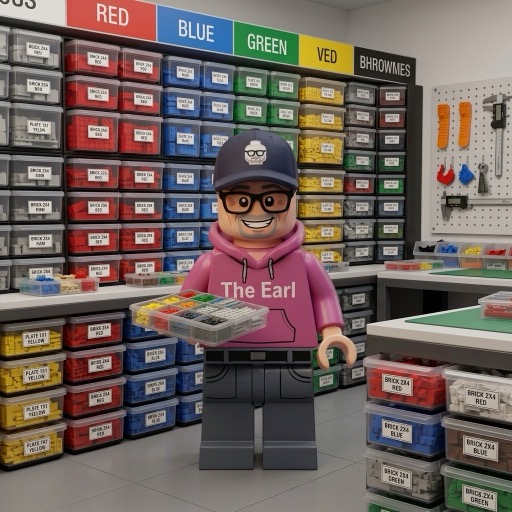
There is a reason every LEGO room on Reddit has a KALLAX in it. The cubes fit standard bins perfectly. They come in sizes from 1x4 up to 5x5. The price is reasonable. And when your collection grows, you just buy another unit - everything stays compatible.
The 4x4 KALLAX is the sweet spot. Sixteen cubes will handle 50,000 to 100,000 sorted pieces when you pair them with the right bins. I use IKEA DRONA fabric boxes for large element categories and aftermarket drawer inserts for small stuff. The top row of cubes doubles as display space for finished models. The lower rows hold sorted parts. One piece of furniture does both jobs.
One thing nobody tells you: bolt it to the wall. A KALLAX loaded with tens of thousands of LEGO pieces is shockingly heavy. If it tips over, you will spend days sorting the aftermath off your floor. I am not exaggerating. Wall anchors are not optional.
For small stuff - 1x1 tiles, cheese slopes, clips, bars, minifig accessories - get yourself some fishing tackle boxes. Individual compartments, latching lids, and they cost a fraction of anything with a LEGO logo on it.
Plano 3700 series. That is the move. Adjustable dividers, clear lids so you can see what is inside without opening them, and they stack on shelves or inside KALLAX cubes. About $8 each. You can set up your entire small-parts system for under $100. LEGO's branded storage products charge three times as much for worse organization.
For tiny quantities of specialty parts - printed tiles, rare colors, one-off elements from specific sets - grab bead organizer boxes from a craft store. Tiny compartments, compact size, and you can store hundreds of unique elements in a single drawer. Slap a label on each compartment and you are done.
Once you cross about 100,000 pieces, drawer cabinets start making sense. I am talking about the small-parts cabinets you see in hardware stores and machine shops. Each drawer pulls out independently, the vertical stacking is space-efficient, and retrieval speed is faster than any shelf-and-bin setup.
Akro-Mils 10164 is a popular choice. Sixty-four drawers in a single unit. Enough compartments for a serious type-based sorting system. Larger drawers from the same line handle bulk bricks and plates. Costs more than KALLAX-and-bins up front, but you make it back in build time you are not wasting on part hunts.
If you want to go all the way, look at wall-mounted Sortimo or Festool Systainer systems. These are professional tool storage cases designed for tradespeople. Expensive - a full wall can run $500 or more - but the build quality is excellent and the density is unmatched. This is the endgame if you build daily and your collection is a working parts library.
You will not remember where you put stuff. I promise. You think you will, and then six months go by without a build session and suddenly you are opening every drawer in the house looking for the Technic liftarms. Labels fix this. They also make your collection usable by anyone else - a build partner, a family member, future-you.
Get a Brother P-Touch label maker. $30 to $50. Refill tape is about $10 a cartridge. The laminated labels stick to plastic bins, fabric boxes, metal drawers, wood shelves - basically everything. Best single purchase I have made for organization, after the storage containers themselves.
Use BrickLink naming conventions so everything is consistent: "Plate 1x4" not "flat 1x4 thingy." Add the element ID number if you want to cross-reference with BrickLink later. For category bins, something descriptive like "Technic - Pins and Connectors" or "Minifig - Headgear." The point is zero ambiguity. Anyone should be able to read a label and know what goes in that container without asking you.
This is optional, but if you are serious about MOC building, tracking your inventory in BrickLink or Rebrickable changes the game. You can plan builds against your actual parts, figure out which sets you can already build, and make BrickLink orders for just the pieces you are missing instead of guessing.
Fair warning: the initial inventory is tedious. You have to count and catalog everything. For a large collection, that is days of work. But once it is done, maintaining it is easy - just add new set inventories when you buy sets and subtract when you sell or lose pieces. The payoff is a searchable database of your entire collection that eliminates guesswork forever.
Here is the biggest mistake I see: treating sorting as a separate activity from building. You build a set, take it apart, toss the pieces into a "to sort" bin, and then never sort them. The bin grows. It becomes its own little universe of chaos. Eventually the to-sort bin IS the collection and you are right back where you started.
Sort as you go. When you disassemble a set, put the pieces away immediately. When you finish a MOC session with loose parts on the table, return them before you leave the room. When a new set arrives, decide right then if it goes on the build queue or into parts inventory. Do not let pieces sit in limbo. Every brick has a home. It should be there when it is not in a build.
I spend about 15 minutes at the end of every building session putting things back. It is not exciting. But it keeps the workspace functional, and it keeps me from losing an entire Saturday to a reorganization project. Fifteen minutes daily beats three hours on the weekend, every time.
Your build surface matters more than you think. You do not need a dedicated room - a desk corner, a folding table, even a converted closet works. What you need is a flat surface, decent lighting, and your storage within arm's reach.
Best upgrade I have made: a light-colored tray with raised edges. White or light grey surface so you can actually see dark pieces (try finding a black 1x1 plate on a dark table - it is miserable). The raised edges keep pieces from rolling off onto the floor, where they disappear into carpet and are never seen again. A large baking sheet from your kitchen works perfectly. Fifteen bucks.
Keep a small parts dish on your build surface too. Pour each bag into the dish instead of dumping it directly onto the table. Pick pieces from the dish. Sweep it clean between bags. It sounds like a minor thing but it genuinely speeds up every build and cuts down on the frustration of hunting through a pile. For more on creating a good building experience, check out our thoughts on the best sets for adult builders.
Here is the shopping list. Total cost: roughly $200 to $300 depending on how big your collection is.
One IKEA KALLAX 4x4 unit ($179) plus wall anchors. Eight to twelve IKEA DRONA fabric boxes ($6.99 each) for bulk bricks, plates, slopes, and large elements. Six to ten Plano 3700 tackle boxes ($8 each) for small and medium elements. One Brother P-Touch label maker ($35) plus a couple refill cartridges ($20). A large light-colored baking sheet for your build surface ($15). Two small compartmented trays for pre-sorting build steps ($10 each).
That is it. Nothing fancy, nothing proprietary, no LEGO logo tax on any of it. This setup handles up to 100,000 pieces and you can expand it as you grow. Once you have it dialed in, you will wonder how you ever built anything out of the shoebox-and-prayer method.
For the deeper decisions, what to keep sorted, what to leave in sets, how to handle a collection that is already out of control, the brick storage breakdown after 500+ sets covers the harder calls. And if you are building display bases for your finished MOCs, the MILS plate guide explains the modular system worth learning before you pour concrete.
Most builders choose between color or type and treat it as permanent doctrine. What actually works is hybrid organization, where your high-volume, frequently-needed pieces are sorted one way, and your specialty or occasional-use inventory is sorted another. Your common slopes, plates, and basic bricks might be sorted by color for fast MOC building. Your minifig parts, printed elements, and specialized pieces might be in a separate tackle box sorted by type. The builders who fight this hybrid approach usually end up redesigning their entire system within a year, wasting money on bins they thought they'd needed.
The second mistake is bigger and harder to fix: storage scaled to your collection at that moment, not to growth. A solid KALLAX setup costs time and money to restructure once you've filled it. Oversizing early feels wasteful but it's actually the economical move. Buy the 5x5 KALLAX instead of the 2x4, grab a few extra bins, and stop. You'll fill them, and when you do, you'll understand your own system well enough to refine it. Underbuy, and you'll be cramming doubles into bins and losing track of what you own. That costs way more than the extra shelf space.